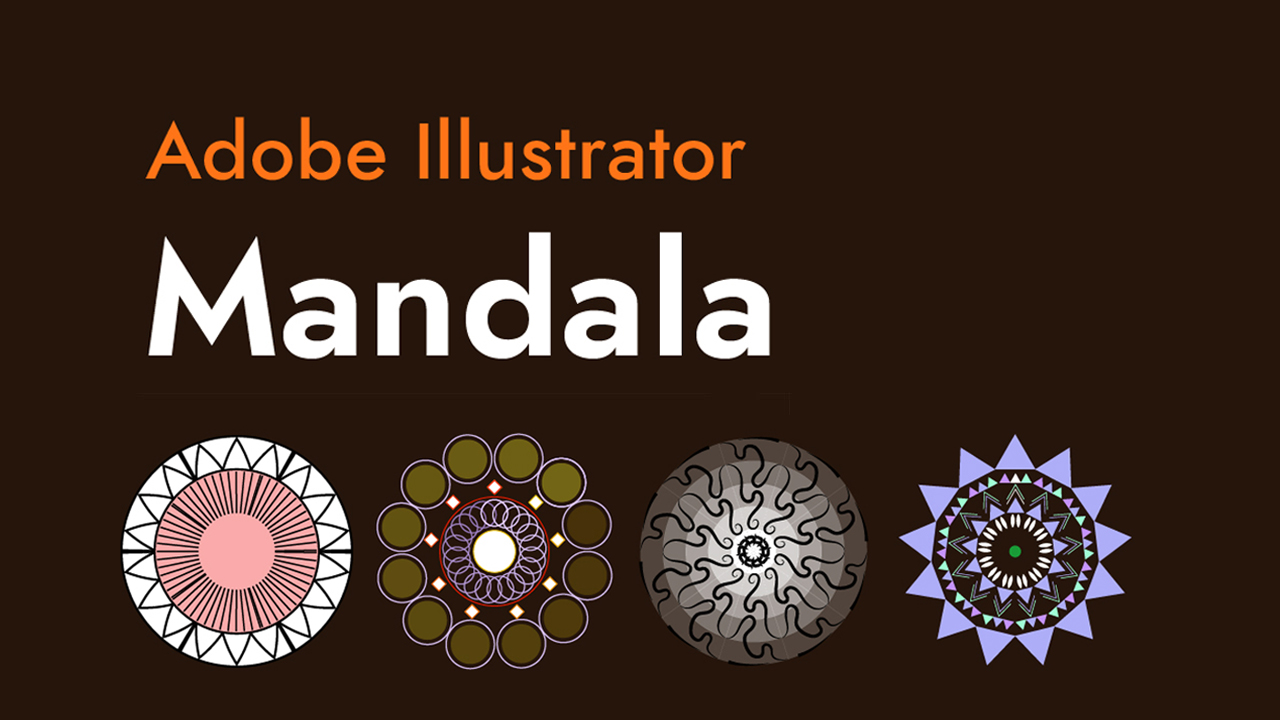
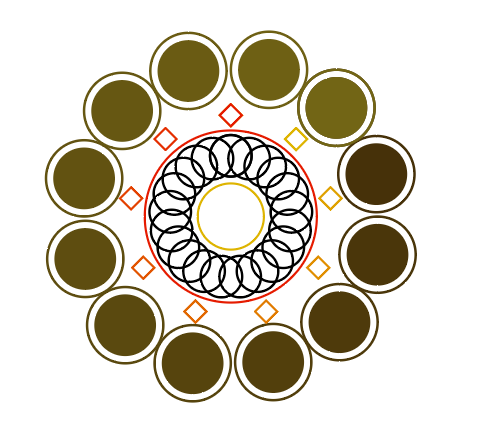
4 ways to make a Mandala in Adobe Illustrator
Hello, my name is Christian and I am a graphic designer based in Massachusetts. In this tutorial we will go over 4 different ways to make a Mandala or Circular Pattern within Adobe Illustrator. The four techniques are Pattern Brush | Replace Spine | Polar Grid | Rotate Effect
1. Pattern Brush
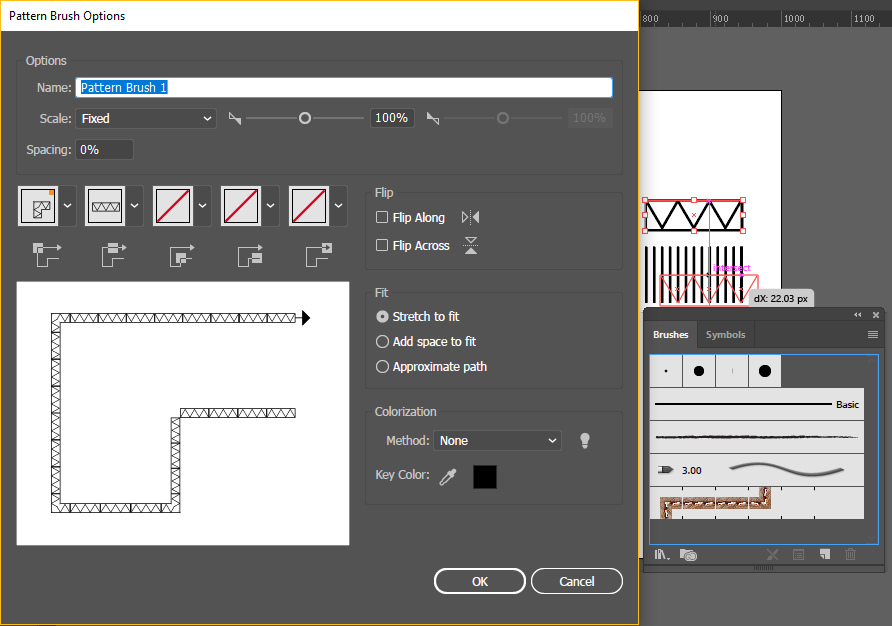
One way to make a circular pattern is to create a pattern which can be used as a stroke on any path. First create a object(s) that we will turn into a patter. With the object selected open the brushes panel (Window > Brushes). Click on the New Brush button or drag the pattern into the Brushes panel. A new brush dialog box will open. Select Pattern Brush. Within the Pattern Brush options there are many settings which I encourage you to experiment with but for our purposes we will be using the default settings.
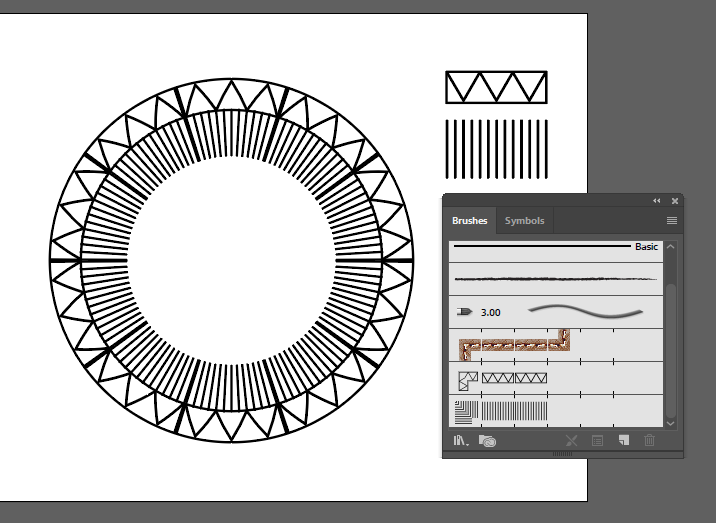
To use the pattern brush create a circle for your mandala and with the circle selected click on your newly created pattern brush. The pattern will replace the stroke of your object. You can alter the appearance of the pattern by changing the stroke size or flipping the axis within the Transform panel.
2. Replace Spine
In our second version of making a pattern around a circle we will be using the blend tool and replace spine. The benefit of using this method is that you leverage the power of the blend tool and can edit the pattern once applied. For our example we will use a blend of two different colored circles. Create two different colors cirlcles and create a blend Object > Blend > Make
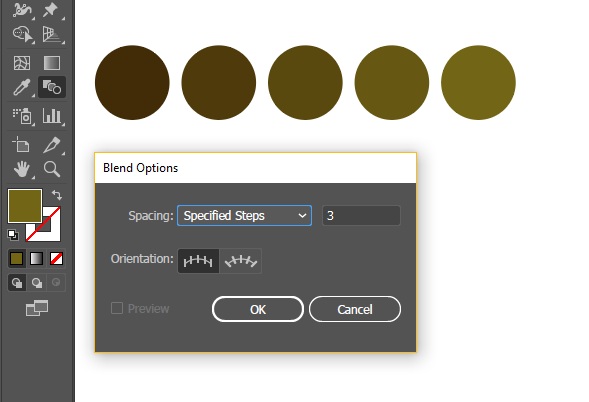
Next bring up the Blend Options by double click the blend tool in the tools panel. Select Specified Steps and choose a number that leaves some white space between the blended circles. Once we have our blend we will create a larger circle to be the base of our second Mandala. With both the blend and circle selected go to Object > Blend > Replace Spine. This will result in the blend going around the circle.
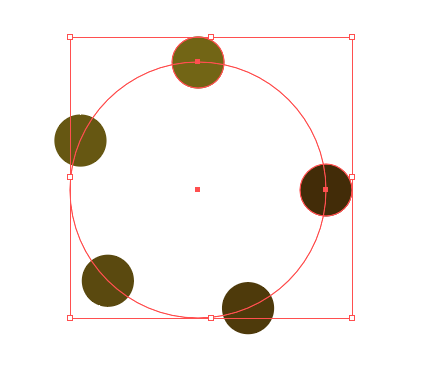
If we increase the Specified Steps within the Blend Options Menu there will be more instances of our blend but you may notice that the blend does not evenly distribute around the circle. In order to fix this grab the Scissors Tool (Keyboard Shortcut C) and click on the path of the large circle. Great now that know how to use a blend around a circle experiment with some shapes and colors. One of the nice features of this version of making a Mandala is that objects can overlap. So try it out for yourself.
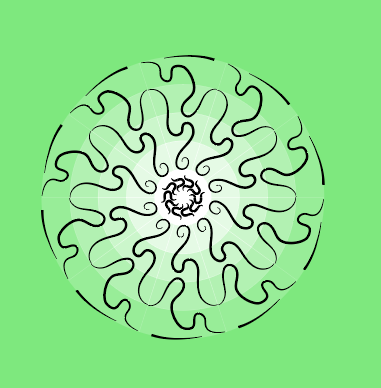
3. Polar Grid
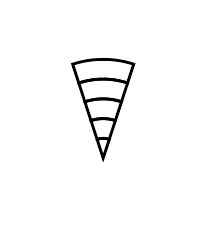
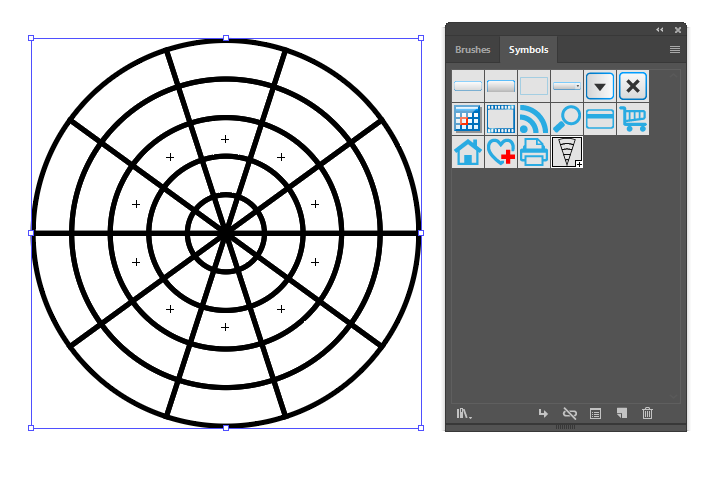
For our third version of a mandala we will be using the Polar Grid Tool. With this tool we will make a circle from one symbol. First grab the polar grid tool which is nested within the Line Segment Tool. With the Polar Grid Tool active click on the artboard. Within the Polar Grid Tool options select Concentric Dividers 5 and Radial Dividers 10. Now that we have the Polar Grid we want to reduce it to a single slice. Firstly lets rotate the grid 18 degrees, click the Divide button in the Pathfinder window, ungrouping everything (Shift Ctrl G or Shift Cmd G), delete all but one slice of the Polar Grid, and lastly group the remaining element (Ctrl G or Cmd G). You should end with a result similar to the image below.
Drag the slice into the Symbols Window and select Graphic as the Export Type. Next use the Rotate tool(R) and while holding down the Alt button Click on the bottom point which will be our center. Since we have 10 slices we will rotate by 36 degrees then click the copy button. Once your first transformation (rotation) is complete Transform Again (Ctrl D or Cmd D) to make the remaining slices. Your should now have a completed circle make up of 10 instances of the same symbol.
Double click the original slice to enter isolation mode and anything drawn here will be done to all instances of the symbol. Feel free to experiment with shapes or the pen tool.
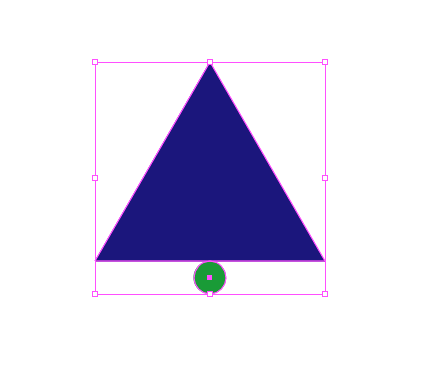
4. Rotate Effect
For our final method of creating a mandala we will use a rotate effect. First thing is to start with an object such as a triangle and create a tiny circle that will be directly below the center line and group the two objects.
Now go to Effect > Distort & Transform > Transform. Use the settings in the picture below. Make sure the Registration point is the lower center square. The adjustments will be the number of copies and angle of rotation. For our example we want 13 copies evenly spaced around the center point. First to figure out the angle of rotation type into the angle field under rotate 360/13 and Illustrator will give you the result 27.69. Now we will change the number of copies. Since we already have 1 object created we will copy it 12 times which will result in 13 total objects.
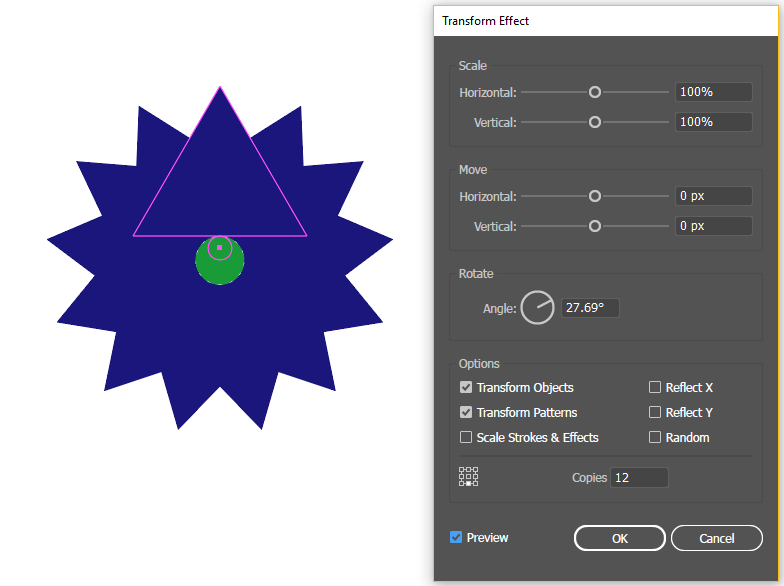
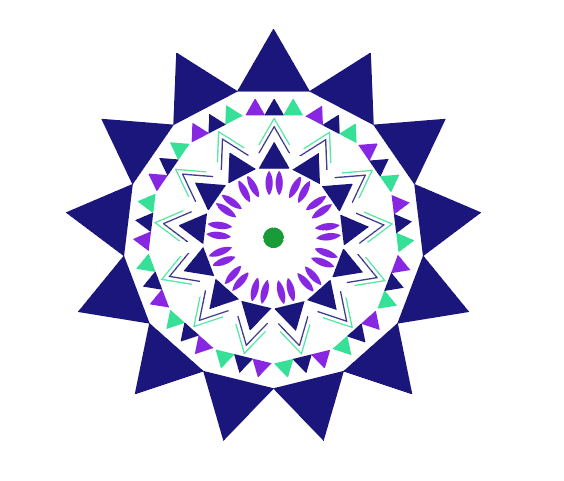
In order to use this effect to create a mandala double click the original object group to enter isolation mode. Click on the triangle and drag the object up. You will notice that every copy will be adjusted. You can also add more triangles or other objects but remember to keep the object aligned to the center otherwise weird things can happen.
Great, now that you know how to make a mandala or circular pattern four different ways go ahead and experiment. You can combine the techniques or use the ones you liked the most. Thanks for following the tutorial. Let me know if you liked it or if you have any questions. Have a good day and take care.
Watch Youtube Video Tutorial
Resources:
How To Create Intricate Circular Patterns with the Blend Tool in Adobe Illustrator by Spoon Graphics
The MOST INTERESTING Grid Tool In Illustrator (MIND BLOWING) by Satori Graphics
How to Duplicate Objects Around a Circle | Illustrator Tutorial by Pixel & Bracket